 how-to
Hidden Water Damage During Renovation: Detection & Claims
Table of Contents
- What Is Hidden Water Damage and Why It Matters During Renovation
- Signs of Water Damage Behind Drywall and Structural Components
- Step-by-Step Protocol for Discovering Water Damage During Renovation
- Homeowners Insurance Water Damage Claim Process
- Hiring Professional Water Damage Restoration Services
- Material-Specific Inspection and Remediation
- Prevention and Maintenance to Avoid Future Hidden Damage
- Frequently Asked Questions
Last Updated: September 18, 2026
What Is Hidden Water Damage and Why It Matters During Renovation
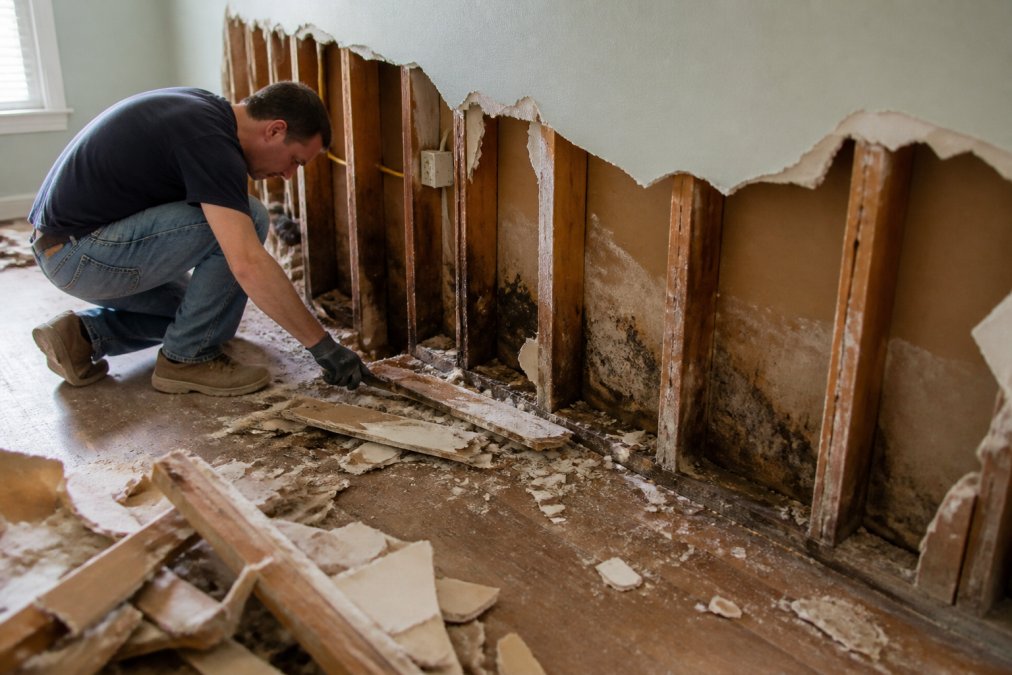
Hidden water damage renovation involves structural water intrusion concealed behind walls, under flooring, or within cavities until renovation work exposes it. This damage threatens your home's integrity and can dramatically change your renovation timeline and budget.
When contractors open a wall during a kitchen or bathroom remodel, they often find soft wood, discoloration, or active moisture signaling serious problems. Water intrusion causes mold remediation needs, structural drying requirements, and potential policy exclusions on your homeowners insurance. Hidden water damage renovation discoveries happen frequently, and the difference between a smooth outcome and a financial crisis often comes down to how you respond in the first 48 hours.
This guide covers how to identify hidden water damage, document it properly for insurance claims, and move forward without derailing your renovation.
Signs of Water Damage Behind Drywall and Structural Components
Visual Indicators and Odor Detection
Water staining on drywall or wood, dark rings, yellow-brown marks, or soft spongy spots, indicates moisture has penetrated the material and begun breaking down its structure.
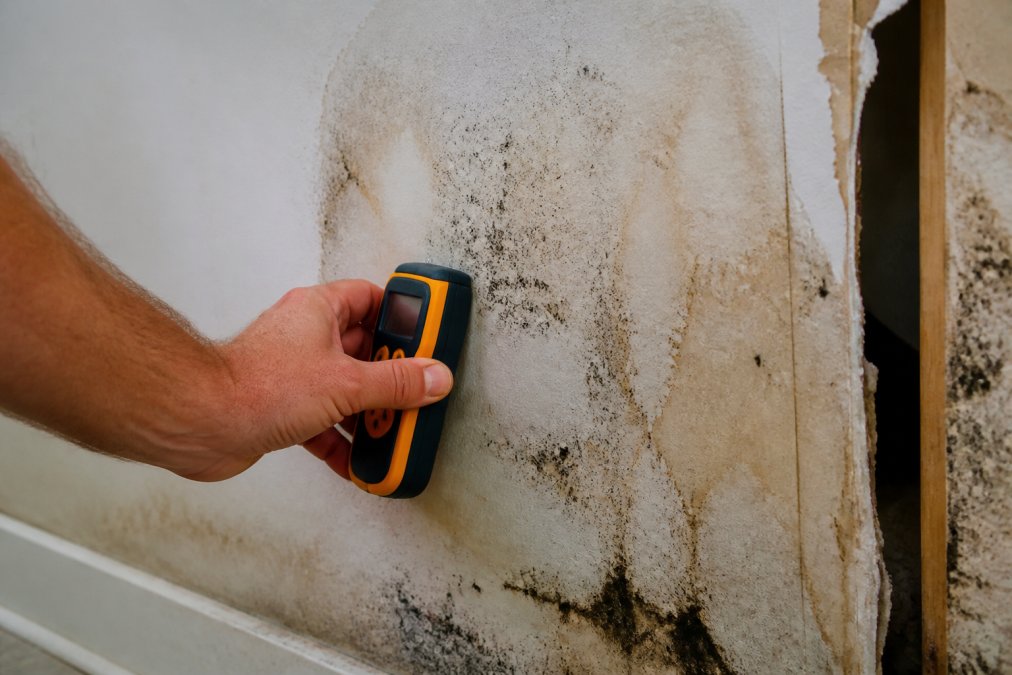
A musty odor is your second warning system. If opening a wall releases a damp, earthy smell, moisture is present and investigation is urgent. Soft or crumbly drywall and wood indicate advanced saturation, press suspect areas, and if the material gives way or crumbles, structural integrity is compromised.
Using Moisture Meters and Thermal Imaging
A moisture meter measures moisture content in wood and drywall. Most building materials should read between 6-12% moisture. Readings above 15% indicate a problem; above 20% means active water intrusion or recent saturation.
Thermal imaging cameras show temperature differences that reveal moisture patterns behind walls. Wet areas read cooler than dry sections. Professional contractors use thermal imaging to map the full extent of hidden moisture before demolition begins. Document elevated readings with photos and note specific locations and meter values.
Step-by-Step Protocol for Discovering Water Damage During Renovation
Pre-Demolition Moisture Baseline (The Critical First Step)
Before your contractor removes any drywall, flooring, or structural elements, establish a moisture baseline. Hire a licensed moisture inspector to scan all areas scheduled for demolition using a moisture meter and thermal imaging. Document readings in writing with photos showing meter values, locations, and dates. If moisture readings are already elevated (above 15%) before demolition begins, you have proof the damage existed before renovation work started. This distinction is critical: insurers often deny claims by arguing the contractor caused the damage during the project.
During Demolition: What to Inspect as Walls Come Down
As drywall, flooring, and framing are exposed, your contractor should pause at each section to assess for moisture damage. Look for specific patterns that indicate when the damage occurred.
Active moisture vs. dried damage: If wood feels soft and spongy or shows water droplets, the leak is still active and requires immediate plumbing investigation. If wood is discolored but hard, the damage is older and the leak may have stopped.
Staining patterns and leak direction: Water stains typically flow downward and outward from the leak source. Photograph these patterns before cleanup, they help plumbers pinpoint the source.
Mold growth location and extent: Mold appears as black, green, or white fuzzy growth on wood and drywall. Note whether mold is surface-level (recent moisture) or deeply embedded (prolonged saturation). Take photos with a ruler in frame to document affected area.
Structural integrity assessment: Press on exposed wood with a screwdriver. If the tool sinks in more than 1/8 inch, the wood is compromised. Mark these areas clearly for your contractor.
Immediate Documentation Protocol
Within 24 hours of discovery, create a written incident report including:
- Date, time, and exact location
- Visual description (color of staining, presence of mold, texture of materials)
- Moisture meter readings (specific percentages and locations)
- Probable cause (e.g., failed caulk, corroded pipe, roof leak)
- Photos and video from multiple angles
- Weather conditions in the past 30 days
- Contractor observations
Email this report to your insurance agent and keep a copy for your records. Do not wait for the contractor to document it, you document it yourself.
Contractor Coordination and Work Stoppage
Notify your general contractor immediately. If the damage is extensive, request a work stoppage in that area until a restoration company assesses it. Get a written statement from your contractor about the damage discovery, including the date they first noticed it and their assessment of the cause.
If your contractor suggests covering up the damage or "just drying it out and moving forward," do not proceed. Water damage remediation must follow industry standards (IICRC guidelines) to be insurable and prevent recurrence.
Timeline for Professional Assessment
Contact a licensed water damage restoration company within 48 hours. They will conduct a full moisture assessment, identify all affected materials, and provide a written scope of work. Do not begin remediation until the restoration company has completed their assessment and your insurance adjuster has visited (if filing a claim).
Homeowners Insurance Water Damage Claim Process
Coverage Limitations and Policy Exclusions
Most homeowners insurance policies cover sudden, accidental water damage from burst pipes or storm damage. They typically do NOT cover damage from slow leaks, poor maintenance, or gradual seepage. Read your policy's exclusions section carefully.
Flood damage is almost never covered by standard homeowners policies. If water damage resulted from groundwater seeping into your basement or flooding, you'll need a separate flood insurance policy through the National Flood Insurance Program or private carrier.
Filing During Active Renovation Work
Contact your insurance agent within 48 hours of discovery. Provide the date, location, and cause of the damage. Request a claim adjuster visit before you begin remediation work. The adjuster needs to see the damage in its current state to evaluate coverage.
Keep all receipts and invoices from remediation work.
Hiring Professional Water Damage Restoration Services
What to Expect from Restoration Contractors
Professional restoration companies begin with moisture mapping using moisture meters and thermal imaging to identify all affected areas. Structural drying is the core of restoration work, using dehumidifiers, air movers, and ventilation to remove moisture from wood, drywall, and insulation. This process typically takes 3-7 days depending on saturation extent and humidity levels.
Contractor Liability and Warranties
Ask for written warranties on restoration work. Reputable contractors guarantee that moisture readings will return to normal levels (6-12%) and that mold will not return within 1-2 years.
Material-Specific Inspection and Remediation
Wood Framing and Rim Joists: Inspection and Salvage Decisions
Use a pin-type moisture meter to measure moisture content at multiple depths. If readings are 15-20%, the wood is wet but may dry in place. If readings exceed 25%, the wood is saturated and will likely require replacement. If readings exceed 30%, replacement is necessary.
Drywall and Gypsum Board: Saturation Thresholds
Drywall that has been wet for more than 24-48 hours should be removed and replaced. The gypsum core absorbs water and becomes a mold incubator. Even if you dry the drywall completely, structural integrity is compromised.
Concrete Subfloors and Basement Slabs: Moisture Barriers and Efflorescence
White, chalky deposits on concrete (efflorescence) indicate that water has moved through the slab. Efflorescence itself isn't structural damage, but it signals that water is moving through the concrete and likely affecting materials above the slab.
Plywood and OSB Subfloors: Delamination and Swelling
Plywood swells when wet, typically expanding 1/8 to 1/4 inch in thickness. Once plywood swells, it doesn't return to its original dimension even after drying. The layers separate (delamination) when water penetrates the glue lines, and delaminated plywood has zero structural value.
Insulation: Why Wet Insulation Must Be Replaced
Insulation absorbs and holds moisture, making it nearly impossible to dry once saturated. Fiberglass batts lose their R-value when wet as water compresses the fibers. Cellulose clumps and settles, creating voids. Spray foam can trap water inside foam cells.
Prevention and Maintenance to Avoid Future Hidden Damage
Inspect your home's exterior at least twice yearly for damaged gutters, missing downspouts, foundation cracks, and gaps around windows and doors. Grade your landscaping away from the foundation so soil slopes downward, preventing water from pooling against the foundation.
Frequently Asked Questions
What are the most common signs of hidden water damage behind walls?
Look for soft or spongy drywall, visible water staining or discoloration, musty odors, and mold growth. A moisture meter reading above 17% indicates saturation. Thermal imaging can reveal temperature differences where moisture is trapped. Peeling paint, warped trim, and efflorescence (white mineral deposits) are also red flags. During renovation, contractors often discover damage in wall cavities, behind baseboards, and around plumbing penetrations where seepage has occurred over time.
Does homeowners insurance cover water damage discovered during a renovation?
Coverage depends on the damage source and your specific policy. Sudden, accidental water intrusion from burst pipes or storms is typically covered. Gradual seepage, sewer backup, and damage from lack of maintenance may be excluded. Review your homeowners insurance policy exclusions before filing. If water damage is discovered during renovation, notify your insurer immediately with photos and documentation. Some policies require mitigation within 24-48 hours, so timing matters when filing a claim.
How do I document hidden water damage for an insurance claim during renovation?
Take detailed photos and video of all affected areas, including moisture meter readings and thermal imaging results. Document the date discovered, the extent of damage, and any visible mold or structural compromise. Keep receipts for emergency mitigation work. Write a detailed account of how the damage was found and when. Obtain a written assessment from your contractor or a professional restoration company. This documentation supports your claim and helps the claim adjuster determine coverage eligibility and settlement amount.
What should I do immediately when hidden water damage is found during construction?
Stop work in that area to prevent further contamination and structural damage. Turn off water to the affected section if a plumbing leak is the source. Increase ventilation and begin dehumidification to prevent mold growth. Take photos and videos of the damage for documentation. Contact your homeowners insurance provider and your contractor immediately. Do not attempt mold remediation yourself if the affected area exceeds 10 square feet. Hire a professional water damage restoration service to assess structural integrity and plan mitigation before renovation resumes.