 how-to
How to Prevent Sagging Fence Panels: A 7-Step Guide
Table of Contents
- Why Fence Panels Sag: Understanding the Root Causes
- Tools and Materials You'll Need
- Step 1: Assess Post Stability and Foundation Depth
- Step 2: Install Proper Hardware for Heavy Fence Gates
- Step 3: Reinforce with Corner Brackets and Diagonal Bracing
- Step 4: Use Shimming Techniques for Vertical Alignment
- How to Maintain a Cedar Fence and Prevent Sagging
- DIY vs. Professional Repair: When to Call an Expert
- Frequently Asked Questions
Last Updated: September 26, 2026
Why Fence Panels Sag: Understanding the Root Causes
Fence panels sag because the posts, hinges, or frame structure fail under stress. Understanding what causes this damage helps you fix it and prevent it from happening again.
Several factors work together to weaken your fence. The most common culprits are foundation problems, weather exposure, and poor installation. Each one weakens the structural integrity of your gate or panel over time.
Post Foundation and Soil Settling
Your fence post sits in the ground. If that foundation isn't deep enough or stable, the post will shift. Soil settling, frost heave in winter, and water pooling around the base all destabilize the post over months or years.
Most fence posts need to go at least 24-30 inches deep. Shallow posts move with the soil. When the post moves, everything attached to it, hinges, brackets, the entire panel, shifts out of alignment.
Water is the enemy here. Wet soil expands and contracts with temperature changes. This constant movement pushes posts upward or sideways. Over time, even small shifts add up to visible sagging.
Weather and Moisture Exposure
Rain, snow, and humidity attack wood fences constantly. Water soaks into wood grain, causing it to swell and shrink with each wet-dry cycle. This movement stresses fasteners and weakens joints.
Cedar and redwood resist rot better than pressure-treated pine, but no wood is immune. Wet wood also becomes heavier. A water-logged fence panel weighs significantly more than a dry one, putting extra load on hinges and brackets.
Salt air in coastal areas and freeze-thaw cycles in cold climates accelerate wood rot. Rot weakens the structural integrity of the frame itself, not just the fasteners.
Poor Installation and Fastener Failure
Fence panels installed with nails instead of screws fail faster. Nails work loose over time as the wood moves. Screws hold better, but only if they're the right type and driven into solid wood or properly anchored hardware.
Using the wrong fastener size or spacing creates weak points. Hinges bolted only at two points instead of three or four can't handle the load. When hardware isn't properly spaced or anchored, the gate frame twists under its own weight.
Mitered joints where panels meet posts are common weak points. If those joints aren't reinforced with brackets or bracing, they collapse inward as the gate sags.
Tools and Materials You'll Need
Before you start, gather these essentials:
- Adjustable wrench or socket set for tightening bolts
- Level (2-4 feet long) for checking vertical and horizontal alignment
- Tape measure for verifying post depth and spacing
- Screwdriver set (Phillips and flathead) for fastener work
- Drill with bits for new holes if installing brackets
- Shovel for digging around posts to check foundation depth
- Shims (wood wedges) for fine alignment adjustments
- Turnbuckle or tension brace kit for diagonal reinforcement
- Corner brackets or L-brackets for frame reinforcement
- Galvanized or stainless steel bolts, screws, and fasteners (never use regular steel, it rusts)
- Wood filler or epoxy if rot is present
- Protective gloves and eye protection
Step 1: Assess Post Stability and Foundation Depth
Start by diagnosing the real problem. Is the post moving, or is the frame sagging? This determines your fix.
Use a level against the post. Check both the front face and the side. If the post tilts, the foundation is failing. If the post is plumb but the panel droops, the frame or hinges are the issue.
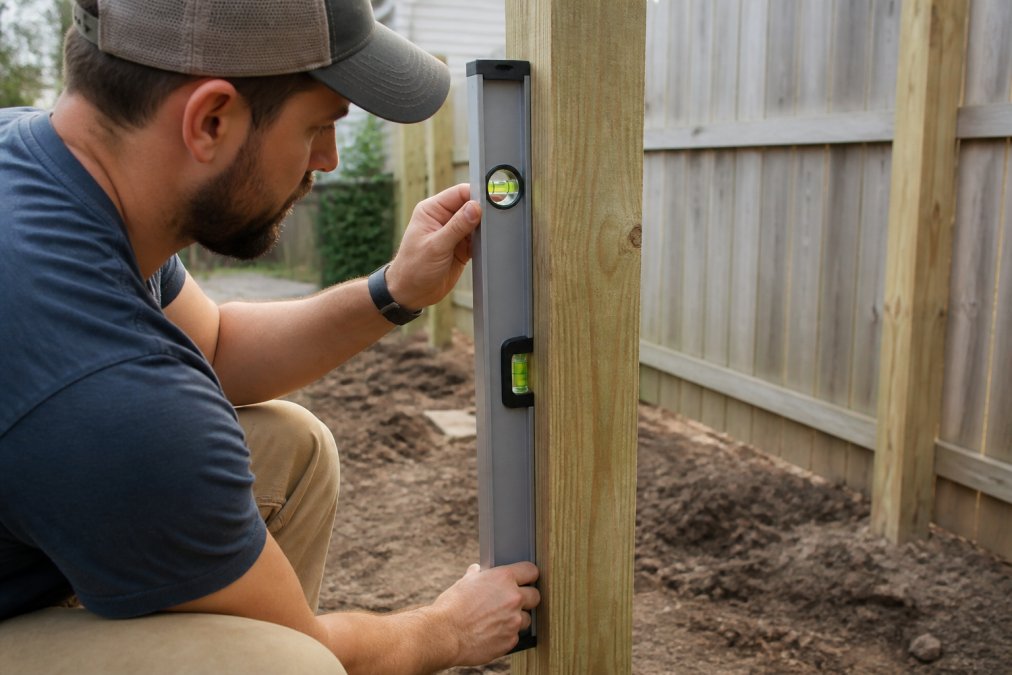
Dig around the base of the post. Most posts should sit 24-30 inches deep in the ground. If you find less than 18 inches, that's your problem. Shallow posts shift with soil movement and frost heave.
Push on the post near the top. It should not move. If it rocks or flexes, the foundation needs reinforcement. Check for soft wood or rot around the base, that indicates water damage and structural failure.
Step 2: Install Proper Hardware for Heavy Fence Gates
Heavy fence gates need strong hardware. Standard hinges designed for lightweight interior doors fail under outdoor load. Gate hinges must be rated for the weight of your specific panel.
Hinge Adjustment and Load-Bearing Support
Hinges carry the entire weight of the gate. Over time, they sag under load. Tightening hinge bolts is the first and simplest fix.
Use an adjustable wrench to tighten all bolts on both the top and bottom hinges. Work evenly, tighten one bolt a quarter turn, then move to the next.
Tension Braces and Compression Braces
Tension braces and compression braces are diagonal supports that prevent the gate frame from racking (twisting). A turnbuckle is a simple tension brace that tightens to pull the frame square.
Step 3: Reinforce with Corner Brackets and Diagonal Bracing
Corner brackets add rigidity at the joints where the frame pieces meet. L-brackets bolted at the top and bottom corners prevent the frame from racking.
For maximum effectiveness:
- Install corner brackets at all four frame corners
- Add at least one diagonal brace from bottom-hinge corner to top-latch corner
- Use stainless steel or galvanized fasteners, regular steel rusts and weakens
- Check all bolts quarterly and retighten as needed
Step 4: Use Shimming Techniques for Vertical Alignment
Shimming adjusts the gate frame to sit perfectly plumb and level. Wood shims are thin wedges you drive under or behind frame members to fine-tune alignment.
Check alignment in multiple directions:
- Vertical: post should be plumb (use a level on the post face)
- Horizontal: top and bottom rails should be level
- Square: measure corner-to-corner diagonals, they should be equal length
How to Maintain a Cedar Fence and Prevent Sagging
Prevention saves money and effort. Regular maintenance catches small problems before they become structural failures.
Seasonal Inspection and Weather Protection
Inspect your fence four times per year, spring, summer, fall, and winter. Look for soft wood, rust on fasteners, loose bolts, and visible cracks or splits.
Wood Rot Detection and Treatment
Soft, spongy wood indicates rot. Poke the wood with a screwdriver or awl. If it sinks in easily, rot is present.
DIY vs. Professional Repair: When to Call an Expert
Some fence repairs are straightforward DIY projects. Others require professional skill and equipment.
DIY is appropriate when:
- The post is plumb and stable
- Hinges or bolts just need tightening
- You're adding brackets or braces to a structurally sound frame
- Wood damage is surface-level only
- You have basic tools and comfort working at height
Call a professional when:
- The post is tilted or unstable, foundation work requires expertise
- Wood rot affects more than 10% of the post or frame
- The frame is severely twisted or cracked
- You need to replace posts or major frame components
- You're uncomfortable working on a ladder or with power tools
Frequently Asked Questions
What are the common causes of a gate sagging?
Gates sag due to weak post foundations, improper hinge installation, and weathering over time. Soil settling beneath fence posts is a primary culprit, especially in areas with poor drainage. Inadequate fasteners and rusted hardware accelerate sagging. Cedar and pressure-treated wood are also vulnerable to moisture absorption and wood rot, which weakens the structural integrity of the frame. Regular inspection helps catch these issues early before sagging becomes severe.
Can I fix a sagging fence panel without replacing it?
Yes, many sagging fence panels can be repaired without full replacement. Tightening hinges, installing turnbuckles or tension braces, and adding corner brackets often restore alignment. Shimming techniques help level the frame, and reinforcement with diagonal bracing prevents future sagging. However, if the post foundation is unstable, the posts may need to be reset deeper into the ground. Assess the root cause first, then choose the appropriate repair method based on whether the issue is hardware, frame alignment, or post stability.
How often should I inspect my fence for structural issues?
Inspect your fence at least twice yearly, in spring and fall, to catch issues before weather damage worsens. After severe storms, heavy snow, or extended rain, do a visual check for post movement, hinge misalignment, and fastener corrosion. For cedar fences, inspect more frequently during wet seasons when wood rot risk is highest. Look for signs of sagging, leaning posts, rust on hardware, and cracks in the wood. Early detection of sagging gate hinges or loose fasteners prevents minor problems from becoming costly structural failures.
What kind of hardware can prevent gates from sagging?
Heavy-duty stainless steel hinges rated for your gate's weight are essential, along with compression braces and turnbuckles that distribute load evenly. Diagonal bracing and corner brackets add structural reinforcement and prevent frame distortion. Anti-sag cables and tension rods help support wide gates over time. Choose hardware with load-bearing capacity that exceeds your gate's weight, especially for large wooden gates. Stainless steel resists rust and corrosion better than standard steel, extending the lifespan of your hardware and preventing sagging caused by fastener failure or hinge wear.
Get a Free Quote
Sagging fence panels don't fix themselves. Small problems become expensive failures if ignored. Cole Home Service & Landscape Construction specializes in fence reinforcement and repair with honest assessment and lasting solutions. We've helped homeowners across the area prevent costly fence failure through proper installation and maintenance guidance. Contact us for a free evaluation of your fence condition and a detailed repair plan tailored to your specific situation.